{
“@context”: “http://schema.org”,
“@type”: “VideoObject”,
“name”: “How do you group or ungroup elements in Google Slides?”,
“description”: “You may want to group multiple objects into one so they will stay together when they are moved or resized. This is often easier than selecting all of the objects each time you want to move them. First, select the objects that you want to group. You can click and drag to select more than one or you can click them individually while holding the Shift key. Once you’ve selected the objects you want to group, right-click and select Group. The selected objects will now be grouped. You can now move or resize all of the objects at once. To ungroup, you have to select the group, right-click and select Ungroup. The objects will be ungrouped and become independent once again. #GoogleSlides #Presentation #Tutorial You can download the design used in this tutorial and more free PowerPoint templates and Google Slides themes at https://www.slidescarnival.com”,
“thumbnailUrl”: “https://i.ytimg.com/vi/37NAdFg5eDk/default.jpg”,
“uploadDate”: “2020-03-10T15:55:49.000Z”,
“duration”: “PT1M9S”,
“embedUrl”: “https://www.youtube.com/embed/37NAdFg5eDk”,
“interactionCount”: “3”
}
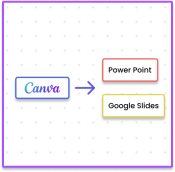
Add dynamic GIF's, captivating videos, and stylish photo frames directly from Canva's royalty-free asset library effortlessly. Share or export anywhere, be it PPT or Google Slides.